.
Kennet
4
24/12/2007
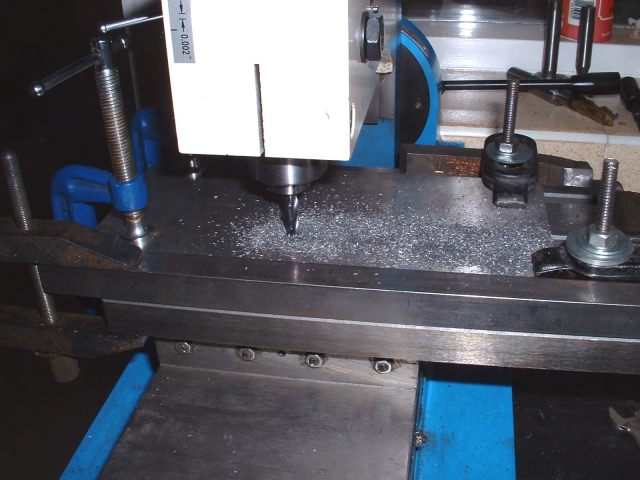
The slot in the intermediate table was tackled next. The first job was to mill one edge of the table flat so that it could be used to guide the table during the slot milling. This was done in the same way as the edge of the main table had been done i.e. a length of square bar was clamped to the opposite edge of the table to form a straight edge which rested on the milling table with the table mounted vertically. One half of the edge was then milled flat and the table slid across to mill the second half.

Milling one edge of the intermediate table flat
I didn't bother cleaning up the other three edges as they were pretty smooth anyway. It looks as though the intermediate table and the topslide are actually thin slices cut from solid cast iron rectangular bar with the cut surfaces ground flat.
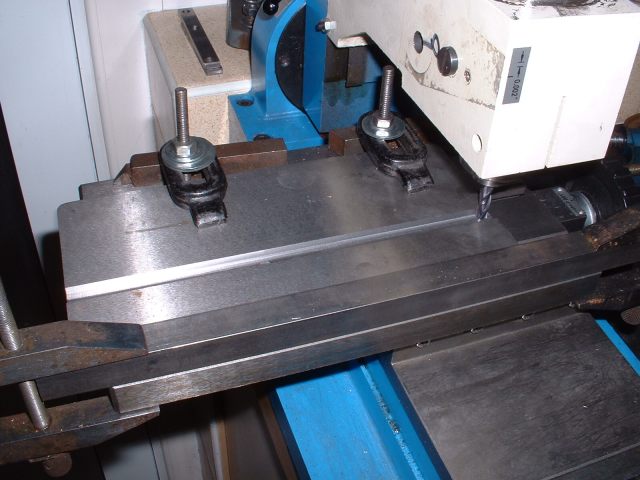
I was now ready to mill the slot in the table and this actually proved quite easy to do. A length of square bar was clamped to the milling table parallel to the edge and the table to be slotted clamped to the milling table with the machined edge against the bar. The table could now be slid backwards and forwards with it remaining in perfect alignment. The slot was milled out in stages cutting half the slot with the table in one position and then sliding it across to cut the second half. I used a solid carbide cutter that some-one from the club gave me and this did the job very easily giving a nice finish. I've never tried these carbide cutters before but they seem to cut very well without loosing their edge. I'll have to get some more!
Taking the first cut
Finishing to a close fit for the guide bar
Whilst the mill was set up I carried on and cut the slot in the topslide. This was a doddle as the slot was less than the travel of the milling table and so could be cut in one go without having to move the work piece.
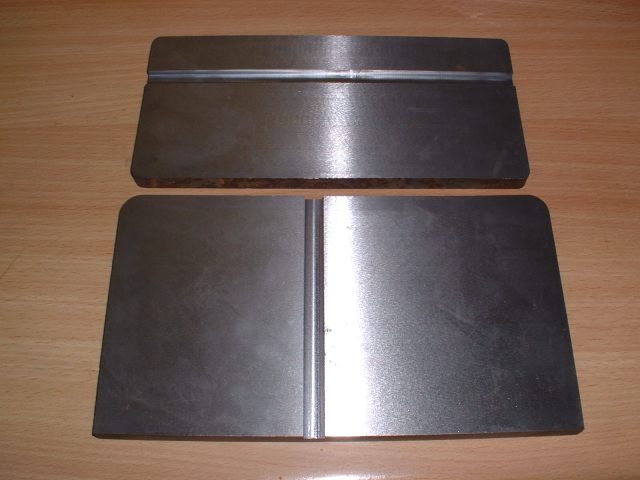
Both slots cut in the intermediate table and the topslide
The final job for the moment on the tables was to cut the guide strips to length and screw them into position with countersink head screws. I then did a trial assembly of all the bits so far to see what everything looked like.

Table clamping bolt in position

Guide bar screwed to table and table fitted to table support

Brass scale fitted to set tilt of table - this comes ready made

Intermediate table in position

Topslide in position on intermediate table
Looking good so far! I think that's the worst over now. The remaining castings are simple holders for the tools to be sharpened and a couple of brackets for table stops. The other items are all fairly simple turning jobs from round bar.
One interesting point about the design is that neither the intermediate table or the topslide are held down in any way and can be just lifted off. The only thing that restricts their movement along the guides is a couple of stops that bear against the topslide. As I don't have any real instructions as to how the grinder is to be set up I am a bit in the dark here as to how the slides are actually used! I suppose all will be revealed when I come to use it (hopefully!)
26/12/2007
I hope everybody has had a nice Xmas and not eaten and drunk too much! Unfortunately I didn't get the Bridgeport mill I asked Santa for -he probably couldn't get it down the chimney!
Anyway, I managed a few hours in the workshop and completed a few more bits.
The casting for the stop bar bracket just needs the face cleaning up where it bolts underneath the main table and this was quickly done in the mill. Two holes were then drilled through the cleaned up pad - one for a dowel pin and the other for a clamping bolt. The vertical end of the bracket has a 5/16" hole drilled and reamed through it for the stop bar and a threaded hole in the side for the stop bar clamping screw.
The holes in the base were spotted through after clamping the bracket in position and then one drilled 1/4" clearance for the locating dowel and the other tapped for the clamping bolt. This was repeated for both ends of the table as the stop bar can be fitted to either end.

Spotting through the fixing holes for the bracket
Last job on the bracket was to make the locating dowel and Loctite it in place. The stop bar locking screw and the bracket fixing screw were two of those I had made earlier.

Completed stop bar bracket
The second bracket (topslide nut) is a gunmetal (?) casting which bolts to the intermediate table and is threaded to take a long screw to adjust the position of the cross-slide in the backwards and forwards direction. This was a simple milling job to clean it up and the threaded hole was tapped in the mill to ensure the thread was square to the bracket. I quite often use the mill as a tapping jig by holding the tap in the chuck and mounting the work on the table. By setting the high/low speed change 'between' gears, the chuck spins freely and can easily be turned by hand, the tap pulls down the quill as it feeds into the work.

Tapping the topslide nut for the adjusting screw
One side of the nut is split and fitted with a locking screw so that the adjusting screw can be locked in position once set. This was done with a slitting saw in the mill.

Slitting one side of the topslide nut
Then followed a few simple little jobs. The intermediate slide was drilled and tapped to take the topslide nut and the adjusting screw turned up from a length of 1" bar. The stop bar is just a length of 5/16" steel bar cut to length and the ends faced off. The brass scale that fits on the topslide comes ready made again and just needs screwing in position. To get this in the right place I centre popped the position of the central stud which holds the tool holders and then scribed a circle on the topslide the same radius as the inside radius of the scale. The scale was then clamped in place and the fixing holes spotted through, drilled and tapped. The centre hole for the stud was then drilled and tapped. The stud is another simple job from a length of bar.

Table assembly with stops and scale fitted
I think that is about it for the table assembly and the base/spindle assembly. All that remains to do now is to turn up the arbors for the various grinding wheels and make the three tool holders - one for endmills/slot drills, one for lathe tools, and one for slitting saws. I shall no doubt come up with other holders for other items once I start using the grinder. The first one that springs to mind is a drill sharpening jig!
<Previous Page......Next Page>